Case Utility Fields
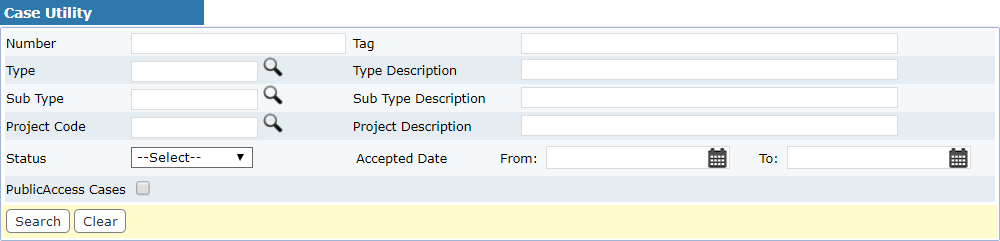
- Number: Enter the case number.
- Tag: Enter the name for the case.
- Type:
- Type Description: The description loads automatically when a case type is selected.
- Sub Type:
- Sub Type Description: The description loads automatically when a case subtype is selected.
- Project Code:
- Project Description: The description loads automatically when a project code is selected.
- Status: Select a case status from the drop-down list.
- Accepted Date From: Enter the beginning date when the case is accepted or select the date using the calendar icon.
- Accepted Date To: Enter the end date when the case is accepted or select the date using the calendar icon.
- Public Access Cases: Select the check box to include Public Access cases.
Case
Select one of the following options after selecting the case(s) in the search results:
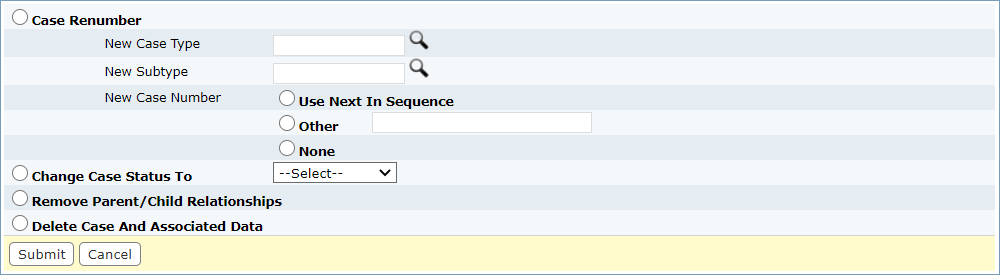
- Case Renumber: Select to renumber the selected case(s).
- New Case Type:
- New Subtype:
- New Case Number
- Use Next In Sequence: Select to use the next case number in the sequence.
- Other: Enter a specific case number.
- None: Select if no case number is needed.
- Change Case Status To: Select a new status from the drop-down list. This changes the selected case(s) to the new status.
- Remove Parent/Child Relationships: Select to remove any parent/child relationships from the selected case(s).
- Delete Case And Associated Data: Select to remove any associated case data from the selected case(s). If a case has a status of Done, it cannot be deleted through the Case Utility tool.